
Servicing wheel bearings — VW
Servicing wheel bearings on VW: factory workshop procedure. Full factory text, tools and checks.
Workshop procedure for VW — the factory write-up, straight from real workshop data.
📋 Procedure
ℹ️ Torque figures below come verbatim from workshop data — always cross-check against your vehicle's factory manual before final tightening.
Note:
Dismantling and assembling wheel bearing as well as the pulling off and pressing in axle beam flange (axle beam not inclusive) can also occur with installed rear axle. If only the wheel bearing has to be disassembled with the installed axle, remove brake carrier completely without pulling off the brake pipes and the handbrake cables. Tie brake carrier.
=> Brake system; Repair group 46; Rear wheel brake, removing and installing brake carrier (drum brake)
Brake system
Rear wheel brake, removing and installing brake carrier (drum brake)
Split-pin
Always renew.
Castle nut
Tighten to 350 Nm (35 kgm) and turn further up to split-pin hole
Note:
Unscrew and tighten axle shaft castle nut only when the vehicle is standing on its wheels. Danger of accident.
Brake drum
Hexagon bolt
60 Nm (6.0 kgm) use bolts 10.9
Spring ring
Washer
Cover for rear wheel bearing
Washer, oil deflector
Oil seal
Pressing off with drift or pressure plate => fig.
3
Pressing in => fig.
4.
Slide spacer, exterior
Grease seal contact surface lightly
O-ring, small
Cover washer
Seal
O-ring, big
Axle tube take off from flange
=> Fig.
6
Press into flange => fig.
7
Adjusting:
=> Manual gearbox; Repair group 34; Drive shafts
Manual gearbox
Drive shafts
Axle shaft
Grease notch with antiseize graphite petroleum
Flange pressing off => fig.
6
Pressing in => fig.
7.
Calibrated grooved pin take off from flange
=> Fig.
5
Slide spacer, interior
Grease seal contact surface lightly
Taper roller bearing
Pulling out => fig.
1.
Pressing in => fig.
2.
Brake carrier complete
Special tools and workshop equipment required
VW 240a
VW 401
VW 407
VW 408a
VW 441
VW 442
VW 447h
VW 402
VW 412
VW 432
VW 433
Hammer
Drift
Fig.1
Taper roller bearing, radial
A -
Puller
Fig.2
Press taper roller bearing in
Insert inner slide spacer first. Use bearings with plastic cage only. Open side of the cage shows outwards.
A -
VW 240a
Fig.3
Take seal out
1 -
VW 408a
2 -
VW 447h
3 -
VW 401
Fig.4
Press seal in
Clean oil drain plug hole first and install oil repelling washer.
1 -
VW 408a
2 -
VW 442
3 -
VW 441
4 -
VW 401
Fig.5
Press calibrated grooved pin out with a drift punch
1 -
Hammer
2 -
Drift
Fig.6
Press axle tube off flange
Reverse position of tool VW 407.
1 -
VW 407
2 -
VW 401
3 -
VW 402
Fig.7
Press flange into the axle tube
The spherical cap must be supported on the upper part.
1 -
VW412
2 -
VW432
3 -
VW433
TorqFix answers live for your specific car — tell it the engine code and it serves the matching sequence, torque figures and wiring for that exact variant.
Ask about my car →🎬 Related video tutorial
Independent AUTODOC tutorial for the same job, filmed on a different model (SHARAN 1) — the technique carries over, the fasteners and figures on this page are the ones for your car.
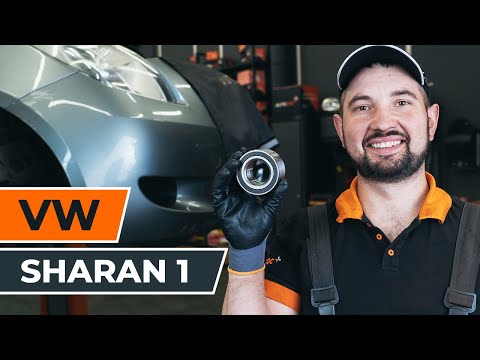
How to change rear wheel bearing on VW SHARAN 1
Other VW procedures
- Removing engine · 41 torque figures
- Removing and installing camshaft – VW Golf Cabriolet · 47 torque figures
- Adjusting valve timing – VW Passat B5 · 83 torque figures
- Removing and installing camshafts – VW Passat B6 · 39 torque figures
- Removing and installing coolant pump · 53 torque figures
- Removing and installing interface for portable navigation and infotainment system J983
- Removing and installing tank pressure sensor G400 – VW 2.0
- Closing fuel tank shut-off valve N361/N362 by mechanical means
- Removing and installing bracket for charging unit 1 for high-voltage batteryAX4
- Removing and installing fuse holder BSB on battery
Who makes these pages, and how
TorqFix was built by a mechanic — after a 2,700 km drive with five roadside repairs that no diagnostic tool could explain.
The figures on this page come from manufacturer workshop documentation and are shown as they are. The page is assembled automatically from that data — it is not written by an AI. The AI works in the chat, where it answers for your specific car. It writes nothing here.
Variants of the same model differ. Cross-check torque against the factory manual for your engine before final tightening.
Seen a figure that does not match your manual? Write to us — we correct it and note when. support@torqfix.com
The story behind TorqFix → · How these pages are made →Workshop data on this page last updated 20 Sep 2026.