
Removing and installing rear wheel bearing — AUDI
Removing and installing rear wheel bearing on Audi: factory workshop procedure. Full factory text, tools and checks.
Workshop procedure for AUDI — the factory write-up, straight from real workshop data.
📋 Procedure
ℹ️ Torque figures below come verbatim from workshop data — always cross-check against your vehicle's factory manual before final tightening.
Note:
Loadbearing and suspension elements are not to be welded and straightened.
Stub axle
Modified design approx. 02.97 ä
=> Parts List
Splash plate
Washer
Cheese-head bolt, 30 Nm
Sealing ring
Version approx. ä 02.97: Fill with multi-purpose grease between sealing lips
Greasing version approx. 02.97 ä
=> Fig.
42-26
Drive home with plastic-headed
hammer
Inner wheel bearing
Drive out outer race with copper mandrel
Pressing in=> Fig.
42-24
Rotor
For vehicles fitted with ABS
Drive off evenly with copper mandrel through tapped holes in wheel hub
Pressing on => Fig.
42-25
Wheel hub
Fill with multi-purpose grease before fitting
Outer wheel bearing
Drive out outer race with copper mandrel
Pressing in =>Fig.
42-24
Hexagon nut
Adjusting wheel bearing clearance
=>Fig.
42-25
Split pin
Replace
Grease cap
Replace
Pressing off => Fig.
42-23
Driving in => Fig.
42-23
Fig.1
Pressing off grease cap
Detach grease cap from its seat by tapping gently on claw.
Fig.2
Driving in grease cap
Note:
Moisture can ingress through damaged (dented) grease caps. Use is therefore always to be made of the special tool shown.
Fig.3
Pressing in outer race for inner wheel bearing
Apply small quantity of wheel bearing grease to wheel bearing seat before pressing in bearing shell.
Fig.4
Pressing in outer race for outer wheel bearing
Apply small quantity of wheel bearing grease to wheel bearing seat before pressing in bearing shell.
Fig.5
Pressing on rotor
Fig.6
Adjusting wheel bearing clearance
Note:
It must be possible to move thrust washer by applying finger pressure to a screwdriver without levering action.
To adjust, start by tightening hexagon nut whilst turning wheel to stop wheel bearing sticking.
Secure with slotted ring and new split pin.
Fig.7
Filling sealing ring approx. 02.97 ä with grease
Sealing rings with dust lips are fitted in conjunction with stub axles approx. 02.97 ä.
Fill channel -arrow- in sealing ring with multi-purpose grease.
Note:
Fig. illustrates procedure on removed sealing ring.
TorqFix answers live for your specific car — tell it the engine code and it serves the matching sequence, torque figures and wiring for that exact variant.
Ask about my car →🎬 Related video tutorial
Independent AUTODOC tutorial for the same job, filmed on a different model (A4 B5 Saloon) — the technique carries over, the fasteners and figures on this page are the ones for your car.
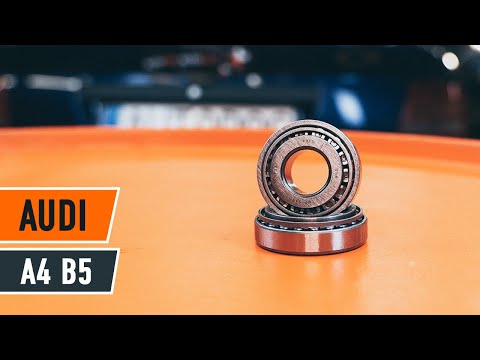
How to change rear wheel bearing on AUDI A4 B5 Saloon
Other AUDI procedures
- Removing and installing toothed belt – Audi · 56 torque figures
- Removing engine – Audi A8 D3 · 41 torque figures
- Removing camshaft timing chain from camshafts – Audi A6/A7 C7 · 38 torque figures
- Installing engine – Audi A8 D4 · 36 torque figures
- Removing and installing camshaft timing chain · 29 torque figures
- Filling up with ATF (for ATF purging procedure)
- Dismantling and assembling differential, four-wheel drive
- Removing and installing dual clutch
- Removing and installing exhaust manifold (right-side) - vehicles with automatic gearbox 0B6
- Checking fuel system pressurisation pump G6 (electrical test), vehicles up to model year 2012
Who makes these pages, and how
TorqFix was built by a mechanic — after a 2,700 km drive with five roadside repairs that no diagnostic tool could explain.
The figures on this page come from manufacturer workshop documentation and are shown as they are. The page is assembled automatically from that data — it is not written by an AI. The AI works in the chat, where it answers for your specific car. It writes nothing here.
Variants of the same model differ. Cross-check torque against the factory manual for your engine before final tightening.
Seen a figure that does not match your manual? Write to us — we correct it and note when. support@torqfix.com
The story behind TorqFix →Workshop data on this page last updated 20 Sep 2026.