
Removing and installing rear wheel bearings — VW
Removing and installing rear wheel bearings on VW: factory workshop procedure. Full factory text, tools and checks.
Workshop procedure for VW — the factory write-up, straight from real workshop data.
📋 Procedure
ℹ️ Torque figures below come verbatim from workshop data — always cross-check against your vehicle's factory manual before final tightening.
Removing and installing rear wheel bearings
Rear axle beam
Cover plate for brake disc
Hexagon bolt
Tightening torque: 25 Nm.
Shrink ring
Check for scoring.
Removing
Fig.
.
To install, heat to approx. 80° and drive onto axle tube to stop.
Rotor for speed sensor
For vehicles with ABS/EDL.
Sheet metal version:
Removing
Fig.
.
Installing
Fig.
.
Solid version:
Removing
Fig.
.
Coat seat with
sealant
AMV 188 200 03
before installing.
Drive into wheel hub to stop with plastic hammer.
Allocation
Parts catalogue
.
Adjusting speed sensor gap
Brake system
Rep. Gr.
45
Removing and installing parts of ABS system on front and rear axles
.
Sealing ring
Fill between sealing lips with
multi-purpose grease
G 052 735 A2
.
Pressing in
Fig.
.
Inner wheel bearing
Drive out outer race with copper drift.
∅ inner race 55 mm.
Pressing in
Fig.
.
Grease with
multi-purpose grease
G 052 735 A2
before installing.
Wheel hub
Removing and installing
Chapter
.
Before positioning, wrap axle tube threads with insulating tape to prevent seal from being damaged.
Remove insulating tape after positioning.
Brake disc
Removing and installing
Brake system
Rep. Gr.
46
Repairing rear brakes
.
Flange
Hexagon bolt
Tightening torque: 200 Nm.
Spring ring
Flat side lies on wheel nut.
Wheel nut
Tightening torque for wheel bolts
Chapter
After the vehicle has been driven 50 km, the wheel nuts must be retightened.
Ball ring
Push onto wheel bolt before mounting wheels.
Flat side lies on flange.
Wheel bolt
To renew, drive out of flange with aluminium hammer.
Pressing in
Fig.
.
Installation position
Fig.
.
Stud
Shielding ring
For vehicles without ABS/EDL.
Coat seat with
sealant
AMV 188 200 03
before installing.
Drive into wheel hub to stop with plastic hammer.
Hexagon bolt
Tightening torque: 25 Nm.
Always renew after removing.
Washer
Outer wheel bearing
Drive out outer race with copper drift.
∅ inner race 50 mm.
Pressing in
Fig.
.
Grease with
multi-purpose grease
G 052 735 A2
before installing.
Thrust washer
Inner slotted nut
Setting wheel bearing play
Chapter
.
Locking plate
After tightening outer slotted nut, bend locking plate over.
Always renew after removing.
Outer slotted nut
Tightening torque: 250 Nm.
Rear axle shaft
Removing and installing
Chapter
.
Self-locking hexagon nut
Tightening torque: 65 Nm.
Always renew after removing.
Remove shrink ring
A
Separating device, e.g. Kukko 17-2 (commercially available)
B
Puller for separating device
C
Shrink ring
D
Axle tube
Remove rotor for speed sensor (sheet metal version)
Lever rotor for speed sensor
A
out of wheel hub
B
using e.g. a screwdriver.
Install rotor for speed sensor (sheet metal version)
Position rotor for speed sensor
A
on wheel hub
B
, and then drive into wheel hub to stop using thrust piece
T50006
.
Remove rotor for speed sensor (solid version)
Only use puller with tensioner, e.g. Kukko 204-2 (commercially available).
A
Puller
B
Rotor for speed sensor
Press in seal
Pressing in inner wheel bearing outer race
Pressing in outer wheel bearing outer race
Pressing in wheel bolts
Wheel bolt installation position
Note
When pressing in, ensure that milled side of wheel bolt comes into contact with flange edge
arrow
.
A
Flange
B
Wheel bolt
TorqFix answers live for your specific car — tell it the engine code and it serves the matching sequence, torque figures and wiring for that exact variant.
Ask about my car →🎬 Related video tutorial
Independent AUTODOC tutorial for the same job, filmed on a different model (SHARAN 1) — the technique carries over, the fasteners and figures on this page are the ones for your car.
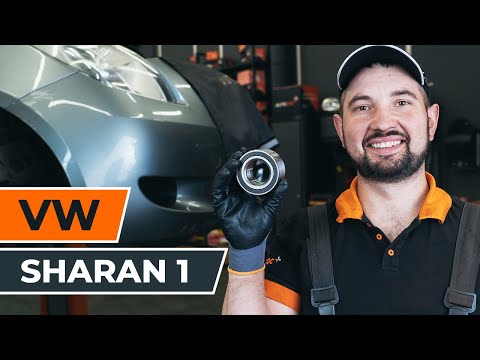
How to change rear wheel bearing on VW SHARAN 1
Other VW procedures
- Removing engine · 41 torque figures
- Removing and installing camshaft – VW Golf Cabriolet · 47 torque figures
- Adjusting valve timing – VW Passat B5 · 83 torque figures
- Removing and installing camshafts – VW Passat B6 · 39 torque figures
- Removing and installing coolant pump · 53 torque figures
- Removing and installing compressor without adaptive suspension valve blockNX7
- Removing and installing front propshaft (joint with plug-in connection on both sides)
- Removing and installing roof side member strip – VW Touareg II
- Removing and installing oil filter housing, engine support
- Removing and installing electric coolant pump – VW
Who makes these pages, and how
TorqFix was built by a mechanic — after a 2,700 km drive with five roadside repairs that no diagnostic tool could explain.
The figures on this page come from manufacturer workshop documentation and are shown as they are. The page is assembled automatically from that data — it is not written by an AI. The AI works in the chat, where it answers for your specific car. It writes nothing here.
Variants of the same model differ. Cross-check torque against the factory manual for your engine before final tightening.
Seen a figure that does not match your manual? Write to us — we correct it and note when. support@torqfix.com
The story behind TorqFix →Workshop data on this page last updated 20 Sep 2026.