
Repairing wheel bearings, vehicles with four-wheel drive and suspension link with wheel bearing diameter 68 mm — VW
Repairing wheel bearings, vehicles with four-wheel drive and suspension link with wheel bearing diameter 68 mm on VW: factory workshop procedure.
Workshop procedure for VW — the factory write-up, straight from real workshop data.
📋 Procedure
ℹ️ Torque figures below come verbatim from workshop data — always cross-check against your vehicle's factory manual before final tightening.
Repairing wheel bearings, vehicles with four-wheel drive and suspension link with wheel bearing diameter 68 mm
Note
If a vehicle has to be moved after the drive shaft has been removed, first install an outer joint instead of the drive shaft and tighten to 50 Nm because otherwise the wheel bearing will be damaged.
Wheel bolt, 110 Nm
Cross-head screw
Self-locking hexagon nut, 230 Nm
Renew.
Loosen and tighten only when vehicle is standing on its wheels (danger of accident).
Remove any paint residues or corrosion from threads of outer joint before fitting nut.
Shim ring
Brake disc
Repair instructions
Item
and
Item
.
Wheel hub
Pressing out, vehicle with drum brakes
Fig.
.
Pressing out, vehicle with disc brakes
Fig.
.
Pulling off inner race
Fig.
Pressing in, vehicle with drum brakes
Fig.
.
Pressing in, vehicle with disc brakes
Fig.
.
Retaining ring
Ensure proper seating.
Wheel bearing
∅ 68 mm
Pressing out and in
Fig.
.
Self-locking bolt, 35 Nm
Renew.
When loosening and tightening, counter hold on guide pin.
Guide pin
Protective cap
Brake caliper
Repairing
Chapter
.
Brake pads
Repair instructions
Item
and
Item
.
Bolt, 60 Nm
Brake carrier
Hexagon bolt, 10 Nm
Cover plate
Hexagon socket head bolt, 10 Nm
Speed sensor
Before inserting, clean and coat circumference with
lubricating paste
G 000 650
.
Spring clip
Handbrake cable
Adjusting handbrake
Chapter
and
Chapter
.
Brake line
Suspension link
Omitted as spare part with wheel bearing diameter 68 mm. Replacement: Installing suspension link with wheel bearing diameter 72 mm
Chapter
.
Drive shaft with rotor
Removing and installing drive shaft
Fig.
Removing and installing rotor
Fig.
.
Pressing out wheel hub (vehicle with drum brakes)
A
Commercially available puller, e.g. Kukko hook, 200 mm long
Pressing out wheel hub (vehicle with disc brakes)
A
Commercially available puller, e.g. Kukko hook, 200 mm long
Pulling bearing inner race out of wheel hub
Use puller with arm clamp only e.g.
Kukko 204/2
(commercially available).
Instead of
thrust plate
40-105
,
adapter
VW 295 A
must be used.
Removing and installing wheel bearings
Pressing in wheel hub (vehicle with drum brakes)
First bolt brake carrier to suspension link.
Tightening torque 65 Nm for Allen head bolt M10 x 18.
Place wheel hub onto
thrust plate
VW 402
.
Pressing in wheel hub (vehicle with disc brakes)
First secure splash plate to suspension link.
Tightening torque: 10 Nm.
Removing and installing speed sensor rotor
Drive rotor off outer joint using a drift. The rotor is destroyed.
Carefully drive new rotor on to stop using blows of a plastic head hammer.
TorqFix answers live for your specific car — tell it the engine code and it serves the matching sequence, torque figures and wiring for that exact variant.
Ask about my car →🎬 Related video tutorial
Independent AUTODOC tutorial for the same job, filmed on a different model (SHARAN 1) — the technique carries over, the fasteners and figures on this page are the ones for your car.
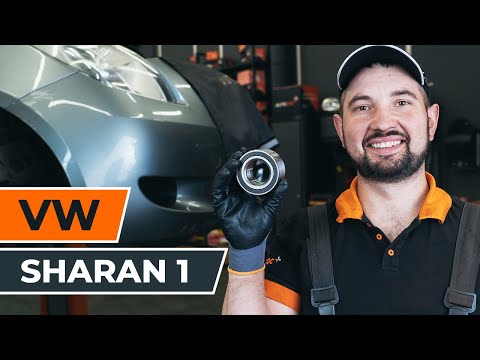
How to change rear wheel bearing on VW SHARAN 1
Other VW procedures
- Removing engine · 41 torque figures
- Removing and installing camshaft – VW Golf Cabriolet · 47 torque figures
- Adjusting valve timing – VW Passat B5 · 83 torque figures
- Removing and installing camshafts – VW Passat B6 · 39 torque figures
- Removing and installing coolant pump · 53 torque figures
- Removing and installing wheel bearing housing (4-point mounting) · 1 torque figures
- Aligning exhaust system free of tension · 2 torque figures
- Removing and installing left reversing light X1 and right reversing light X2 · 2 torque figures
- Removing and installing speed sensor on rear axle (drum brakes) · 2 torque figures
- Removing and installing clutch slave cylinder
Who makes these pages, and how
TorqFix was built by a mechanic — after a 2,700 km drive with five roadside repairs that no diagnostic tool could explain.
The figures on this page come from manufacturer workshop documentation and are shown as they are. The page is assembled automatically from that data — it is not written by an AI. The AI works in the chat, where it answers for your specific car. It writes nothing here.
Variants of the same model differ. Cross-check torque against the factory manual for your engine before final tightening.
Seen a figure that does not match your manual? Write to us — we correct it and note when. support@torqfix.com
The story behind TorqFix →Workshop data on this page last updated 20 Sep 2026.