
Repairing constant velocity joint — AUDI
Repairing constant velocity joint on Audi: 24 steps. What to remove, in what order, and what to check after.
Workshop procedure for AUDI — the exact step sequence and torque figures, straight from real workshop data.
🧭 Before you start
Fits: VW Transporter T5 (7H), VW Transporter T5 (7J), VW Transporter T6 (7E), VW Transporter T6 (7F)
Don't miss
- Clamp must not be loosened.
- Sealant bead must not be damaged when installing.
- Position joint protective boot in outer groove (arrow 2). Inner groove (arrow 1) must remain visible.
📋 Procedure
- Clamp propshaft in vice with jaw protectors.
- Prise out cap with a screwdriver.
- Remove seal (arrow).
- Drive down joint protective boot with a brass or copper drift. [Note: Clamp must not be loosened.]
- Remove retaining ring using pliers3340.
- Position component and tools as illustrated.
- Press off constant velocity joint.
- Open small clamp on propshaft and pull protective boot off propshaft.
- Apply sealantElectronic Parts Catalogue to cleaned inner surface of cap of joint boot. Apply sealant bead of 2-3 mm in diameter without interruption along inside of holes (arrows).
- Push joint protective boot with small clamp onto propshaft.
- Drive on joint to stop using drift sleeveVW 244 B.
- Insert new retaining ring.
- Check retaining ring is seated correctly.
- Before installing cap, press 40 grams of joint greaseElectronic Parts Catalogue into joint protective boot through ball race. [Note: Sealant bead must not be damaged when installing.]
- Align cover with bolts (arrows) with bolt holes.
- Drive on cover with a plastic hammer.
- Remove sealant which is pressed out.
- Press 20 grams of joint greaseElectronic Parts Catalogue into joint protective boot through ball race.
- Clean contact surface for seal.
- Pull off protective film and bond seal (arrow) in constant velocity joint.
- Align new cover (A) with bolt holes.
- Press on cover (A) as shown.
- Position joint protective boot in outer groove (arrow 2). Inner groove (arrow 1) must remain visible.
- Close clamp with pliers3340.
🎬 Related video tutorial
Independent AUTODOC tutorial for the same job, filmed on a different model (A6 C5 Avant) — the technique carries over, the fasteners and figures on this page are the ones for your car.
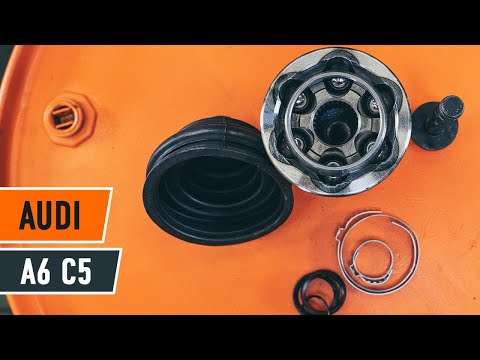
How to change cv joint on AUDI A6 C5 Avant
Other AUDI procedures
- Removing and installing toothed belt – Audi · 56 torque figures
- Removing engine – Audi A8 D3 · 41 torque figures
- Removing camshaft timing chain from camshafts – Audi A6/A7 C7 · 38 torque figures
- Installing engine – Audi A8 D4 · 36 torque figures
- Removing and installing camshaft timing chain · 29 torque figures
- Re-determining shim "“S"4” when renewing bearing housing · 1 torque figures
- Removing and installing seat occupied sensor (front passenger side)G128
- Removing and installing exterior mirror – Audi Q7 · 1 torque figures
- Calibrating reversing camera R189
- Removing and installing alternator - vehicles with 2.0 ltr. TDI engine (PR number TL4)
Who makes these pages, and how
TorqFix was built by a mechanic — after a 2,700 km drive with five roadside repairs that no diagnostic tool could explain.
The figures on this page come from manufacturer workshop documentation and are shown as they are. The page is assembled automatically from that data — it is not written by an AI. The AI works in the chat, where it answers for your specific car. It writes nothing here.
Variants of the same model differ. Cross-check torque against the factory manual for your engine before final tightening.
Seen a figure that does not match your manual? Write to us — we correct it and note when. support@torqfix.com
The story behind TorqFix →Workshop data on this page last updated 20 Sep 2026.