
Renewing brake caliper (1LK / 1LH), TTS — AUDI
Renewing brake caliper (1LK / 1LH), TTS on Audi: 19 steps. What to remove, in what order, and what to check after.
Workshop procedure for AUDI — the exact step sequence and torque figures, straight from real workshop data.
🧭 Before you start
Fits: platform code FV
- Opens: brake fluid
Don't miss
- This closes the valves in the brake master cylinder and stops the brake fluid reservoir from running empty.
- Risk of skin irritationAlways wear chemical-resistant protective gloves to prevent brake fluid from contacting skin. — Detach protective cap (3) from bleeder screw (1).
- The brake pedal actuatorV.A.G 1869/2 must not be removed.
- Make sure the brake hose is routed correctly. The brake hose must not be kinked, crushed or twisted or chafe against parts of the vehicle at any point.
- After installing the brake caliper, check that the retaining springs and brake pads are seated correctly . — Plug in electrical connector (arrow) on contact for pad wear indicator on brake caliper.
📋 Procedure
- Insert brake pedal actuatorV.A.G 1869/2 between brake pedal and driver's seat. Depress brake pedal at least 60 mm. [Note: This closes the valves in the brake master cylinder and stops the brake fluid reservoir from running empty.]
- Remove front wheel Running gear, axles, steering44Wheels, tyres.
- ⚠ Risk of skin irritationAlways wear chemical-resistant protective gloves to prevent brake fluid from contacting skin. — Detach protective cap (3) from bleeder screw (1).
- Fit bleeder hose (2) of bleeder bottle onto bleeder screw.
- Open bleeder screw to relieve pressure in hydraulic system.
- Close bleeder screw and remove bleeder bottle. [Note: The brake pedal actuatorV.A.G 1869/2 must not be removed.]
- Place a cloth under the connection to catch escaping brake fluid.
- ⚠ Risk of malfunction if brake fluid comes into contact with fluids containing mineral oils.Do not under any circumstances allow brake fluid to come into contact with fluids that contain mineral oils (e.g. oil, petrol, cleaning agents). Protective gloves must be free of oil and grease.Risk of damage to paintwork surfacesDue to its corrosive effect, brake fluid must not be allowed to come into contact with paintwork. Rinse off brake fluid spillages immediately using plenty of water. — Unplug electrical connector (arrow) on contact for pad wear indicator on brake caliper. [Note: To make it easier to remove the brake caliper from the brake disc, use suitable pliers (1) to press back the brake pad (3) slightly as shown in the illustration.Illustration is only an example.To avoid damaging the paint on the caliper, insert a piece of rubber (2) or similar between the caliper and the pliers.]
- Remove bolts (1) for brake caliper.
- Detach brake caliper.
- ⚠ Risk of damage to brake hoseDo not leave the brake caliper hanging from the brake hose. Take care that brake hose is not damaged by weight of brake components.The brake hose must be renewed if it is damaged.Risk of damage to brake caliper pistonsDo not apply brake when brake caliper is removed. — Remove brake pads if necessary .
- Clean brake caliper.
- Install brake pads .
- Carefully fit brake caliper (with pads installed) over brake disc.
- Secure brake caliper with new bolts (1). [Note: Make sure the brake hose is routed correctly. The brake hose must not be kinked, crushed or twisted or chafe against parts of the vehicle at any point.]
- ⚠ After installing the brake caliper, check that the retaining springs and brake pads are seated correctly . — Plug in electrical connector (arrow) on contact for pad wear indicator on brake caliper.
- Remove brake pedal actuatorV.A.G 1869/2. [Note: You should only bleed the brakes at the wheel where the caliper was removed and the brake line disconnected. If the brake pedal still feels "“soft”", bleed the complete brake system Bleeding hydraulic system.]
- Bleeding hydraulic system
- ⚠ Risk of accident!Firmly depress the brake pedal several times with the vehicle stationary, so that the brake pads are properly seated in their normal operating position.Make sure that the brakes work properly before the vehicle is driven on the road. — Check brake fluid level and top up if necessary.
🎬 Related video tutorial
Independent AUTODOC tutorial for the same job, filmed on a different model (A3 2 (8PA)) — the technique carries over, the fasteners and figures on this page are the ones for your car.
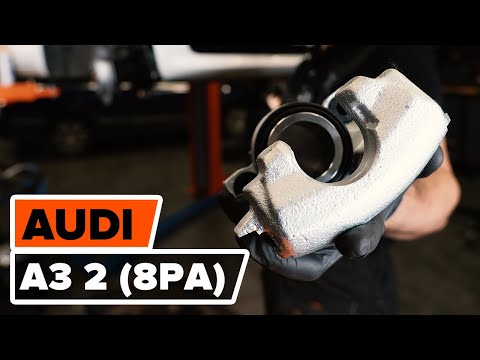
How to change front brake caliper on AUDI A3 2 (8PA)
Other AUDI procedures
- Removing and installing toothed belt – Audi · 56 torque figures
- Removing engine – Audi A8 D3 · 41 torque figures
- Removing camshaft timing chain from camshafts – Audi A6/A7 C7 · 38 torque figures
- Installing engine – Audi A8 D4 · 36 torque figures
- Removing and installing camshaft timing chain · 29 torque figures
- Incorporation of auxiliary heater on vehicles with heater coolant shutoff valve N279
- Checking by-pass air cut-off valve for central idling speed N8
- Exploded view - gearbox housing cover and 5th/6th gear
- Removing and installing mechatronic unit for dual clutch gearbox J743
- Checking heated rear window Z1
Who makes these pages, and how
TorqFix was built by a mechanic — after a 2,700 km drive with five roadside repairs that no diagnostic tool could explain.
The figures on this page come from manufacturer workshop documentation and are shown as they are. The page is assembled automatically from that data — it is not written by an AI. The AI works in the chat, where it answers for your specific car. It writes nothing here.
Variants of the same model differ. Cross-check torque against the factory manual for your engine before final tightening.
Seen a figure that does not match your manual? Write to us — we correct it and note when. support@torqfix.com
The story behind TorqFix →Workshop data on this page last updated 20 Sep 2026.